How to Measure a Room
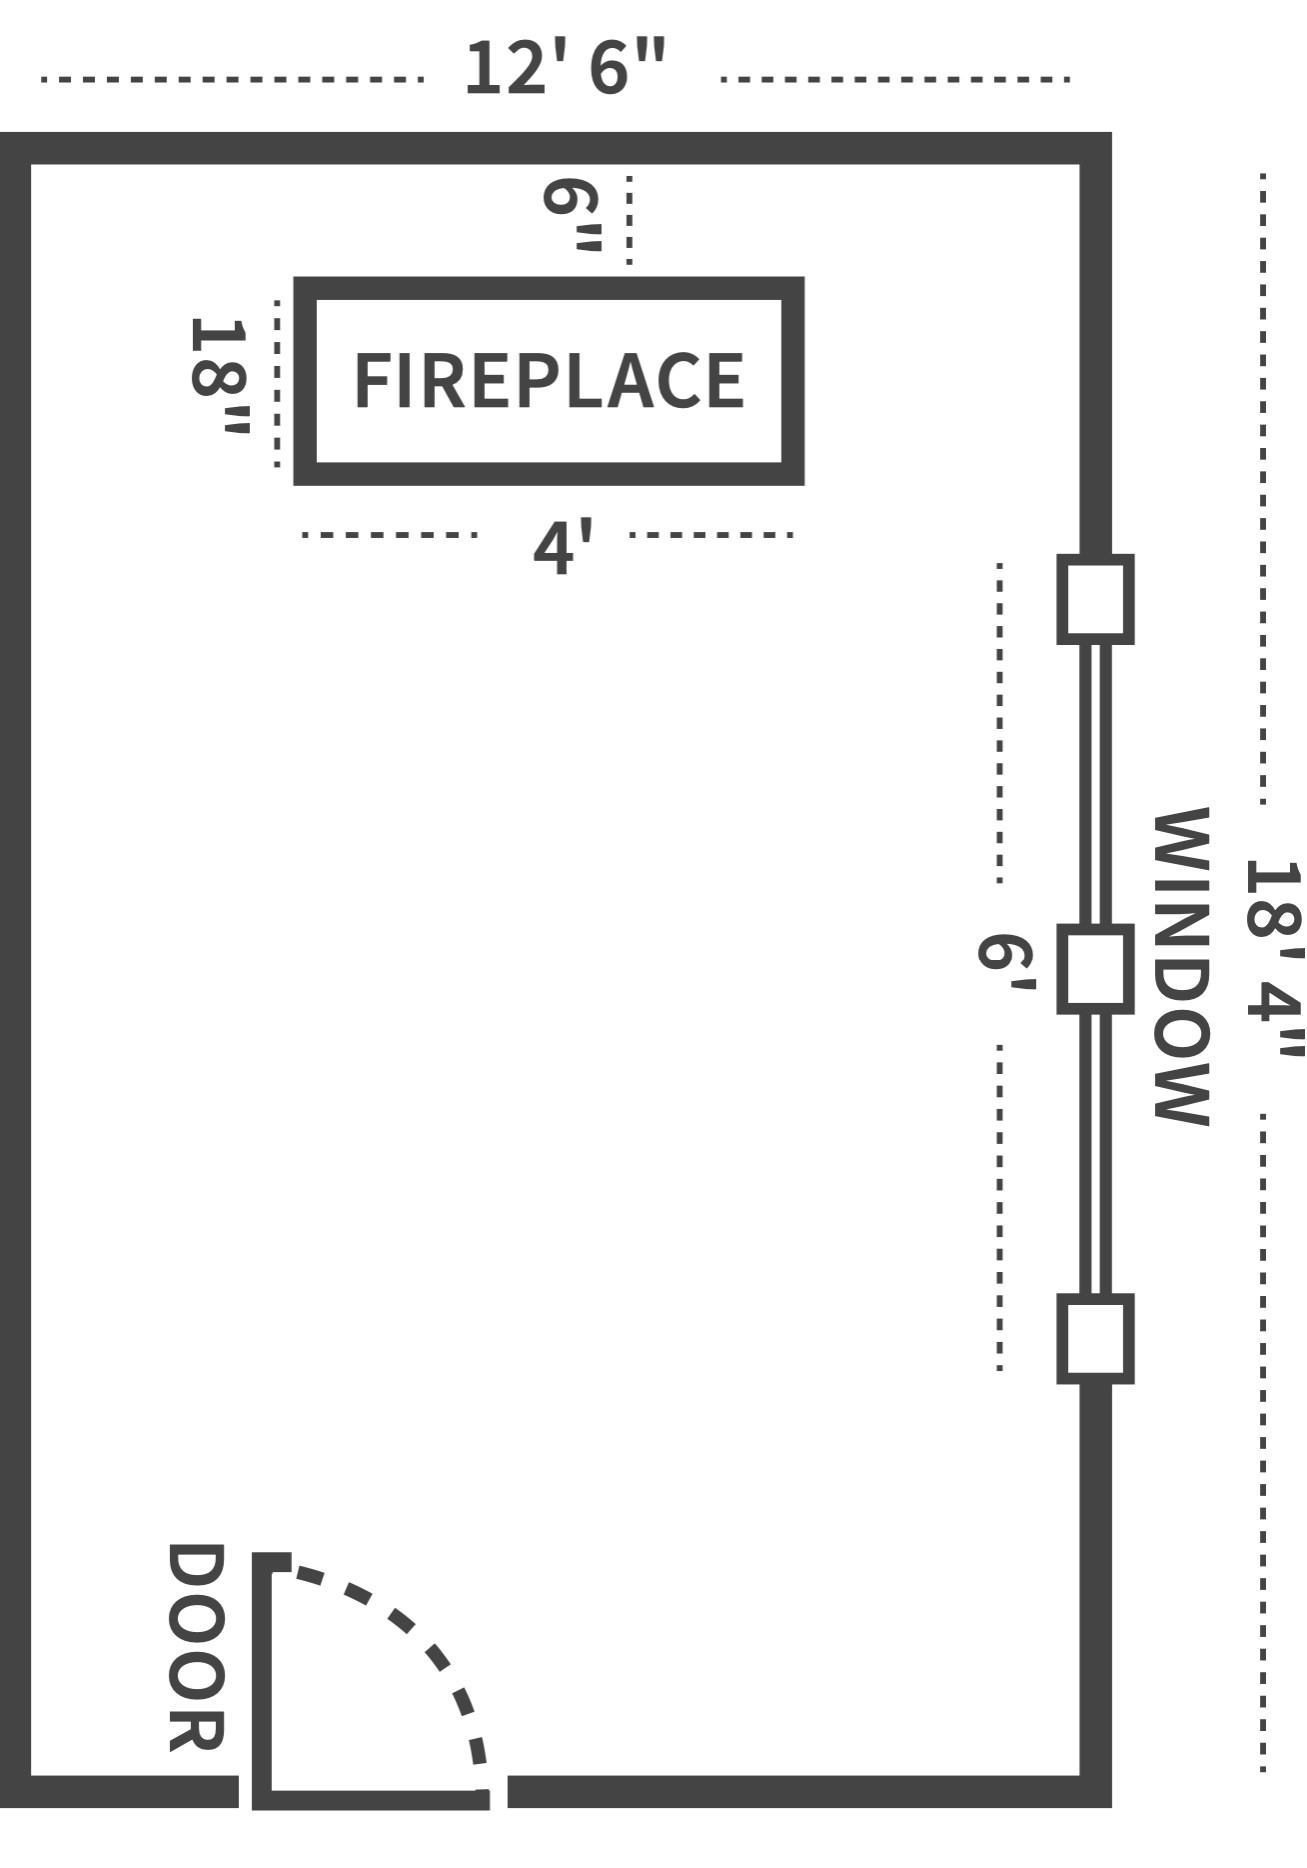
STEP 1: Using pencil, draw the existing layout of your room on the graph paper provided in the printable guide. Don’t worry about scale! Include the locations of windows, doors, openings, built-ins, and closets.
STEP 2: Use a tape measure to measure the overall length of each wall (corner to corner). Note these measurements on your drawing.
STEP 3: Measure each wall in detail, using this method: Start in one corner of the room. Measure the distance from the corner to the outside edge of the window casing; from there to the opposite edge of the window casing; from there to the edge of a built-in bookcase; and so on until you reach the opposite corner
STEP 4: Total the above detailed measurements; the total should match your first overall measurement. Note these measurements on your drawing.
STEP 5: Continue this process around the room.
STEP 6: Other information that would be helpful to note on your drawing: Ceiling height; location of electrical outlets; height of windows and doors, location of ceiling lights and wall sconces.
How to Photograph a Room
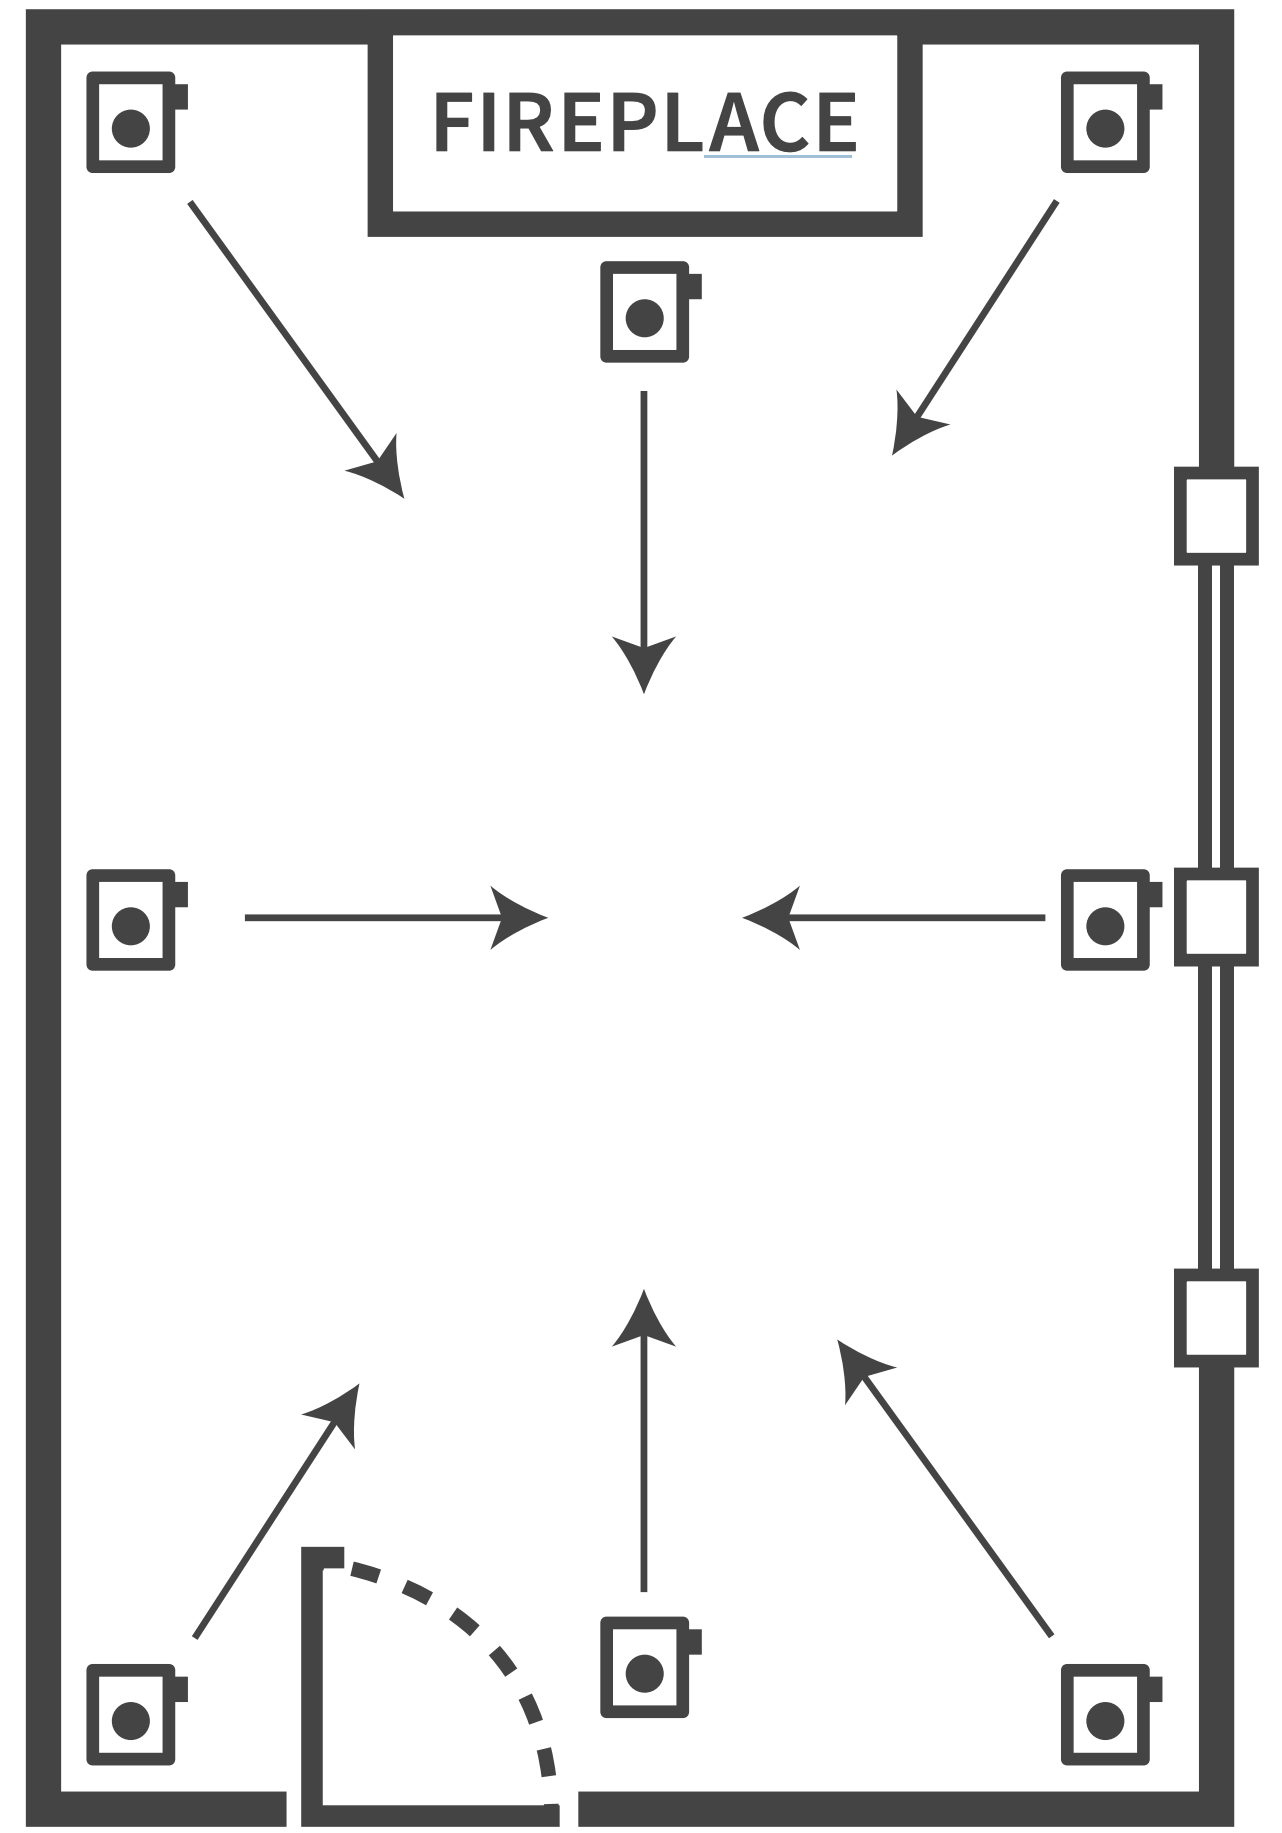
STEP 1: Stand in one corner and take wide shots of the room facing all directions.
STEP 2: Stand in the opposite corner and do the same.
STEP 3: Be sure to include landscape (wide) photos as well as portrait (tall) photos.
STEP 4: Include photos that clearly show the locations of windows, doorways, electrical outlets, heating vents, etc. – anything we’d need to consider when selecting furnishings and decor.


Have Furniture You're Keeping in the Space?
If there are existing furniture, decor, or lighting pieces that you're planning to keep in the room and want them included in the design, we'll need photos and measurements of each item.
STEP 1: Photograph the item straight-on (so we have a clear image to include in your moodboard).
STEP 2: Photograph the item at an angle, so we can see the depth of the piece and any details on the top/sides.
STEP 3: Measure the width of the piece (side to side), the depth of the piece (front to back), and the height (bottom to top).
STEP 4: Repeat with each item you're keeping.
Got All Your Photos and Measurements?
If this information wasn't uploaded with your questionnaire, please email your digital photos, scanned floor plans, and any other relevant notes or reference pictures to [email protected].
